Share with Password in Google Drive (Easiest Way in 2025)
In this article, we will show you how to share with password in Google Drive. Simply follow the steps below.
How to Share with Password in Google Drive
As long as you don’t give anyone your account password, there isn’t any way that someone else can access your documents unless you deliberately share them. Here’s how to share a file with a password in Google Drive:
1. Download the VeraCrypt Encryption Software
Visit the official VeraCrypt website to download the encryption software. Make sure to download the version that matches your operating system to ensure compatibility.
2. Install VeraCrypt on Your Computer
Open the downloaded file and follow the on-screen installation instructions to install VeraCrypt on your computer. This step is crucial as you need VeraCrypt installed to create encrypted containers and protect your files.

3. Start VeraCrypt and Initiate a New Encrypted File Container
Search and open VeraCrypt from your computer’s Start menu.

In the main window, click on the button labeled ‘Create Volume’. This will start the process of creating a new encrypted container.

Select ‘Create an encrypted file container’ to specifically secure your files without encrypting your entire drive. Click ‘Next’ to proceed with the setup.

4. Select Standard Encryption Volume Type
When prompted, choose ‘Standard VeraCrypt volume’. This option will provide robust security suitable for most personal and professional needs, including protecting business documents. Click ‘Next’ to proceed.

5. Define the Location and Name of Your Encrypted Container
In the volume creation wizard, you’ll be prompted to ‘Select File’. Use this option to navigate to the folder where you want to save your encrypted container.

In our example, let’s save it under the ‘Company Documents’ folder.

Enter a name for your file, ensuring it does not yet exist in the chosen directory. For example, we will name our file ‘Digital Marketing Strategies.’ After typing the name, click ‘Save’ to establish this file as the encrypted container for your documents.

6. Select Encryption and Hash Algorithms
You will see a list of encryption and hash algorithms. While VeraCrypt defaults are generally suitable, you can choose based on your preference or advice from security guides.
In our example, we will select AES (Advanced Encryption Standard) for the encryption algorithm due to its strong security features and widespread acceptance.

For the hash algorithm, we will use SHA-512, which offers enhanced security by generating a longer hash value. Click ‘Next’ to proceed with these settings.

7. Specify the Size of Your Encrypted Volume
Enter a size for your volume based on the total size of the documents you plan to encrypt.
In our example, we have the “Digital Marketing Strategies” document that is around 500 KB. We might choose a size of 10 MB to ensure ample room for growth. So, let’s type 10 MB into the volume size field, then click ‘Next’ to proceed.

8. Create a Strong Password for Your Volume
Choose a strong, memorable password that includes a mix of letters, numbers, and symbols. This password is essential as it will be required every time you want to access the encrypted files.
For example, we can use a password like ‘M@rk3t1ng#2024’ for our encrypted volume. Then, click ‘Next’ to proceed.

9. Format the Volume to Finalize the Encryption Setup
As part of the setup, you’ll need to move your mouse around within the VeraCrypt window to generate randomness, which enhances the security of the encryption keys.
Once done, click ‘Format’ to finalize creating your encrypted volume.

10. Mount Your Encrypted Volume in VeraCrypt
Go back to the main VeraCrypt window, and select a drive letter from the list. For example, let’s select the drive letter H.

Then, click on ‘Select File’ to load your newly created encrypted volume file.

After you have selected your file, click on the ‘Mount’ button to proceed.

You will be prompted to enter your password. Type in the password you created earlier to unlock and access the encrypted space. In our example, it is the ‘M@rk3t1ng#2024.’ Then, click OK to proceed.

11. Transfer Your File into the Encrypted Volume
Open the mounted volume through your computer’s file explorer.

Your mounted volume will appear as a new drive.

Drag and drop your file into this drive. It will be automatically encrypted and securely stored within the volume.

12. Securely Dismount the Encrypted Volume in VeraCrypt
After transferring the files, go to VeraCrypt and click ‘Dismount’ for the drive letter where your encrypted volume is loaded. This action locks the volume, ensuring that no unauthorized changes can be made to the files inside.

13. Upload the Encrypted Volume File to Google Drive
In your Google Drive, click on the ‘New’ button located on the left side of the interface. From the dropdown menu, select ‘File upload’.

Browse to the location on your computer where your VeraCrypt volume file is saved. In our example, it is the ‘Digital Marketing Strategies.’ Select this file and click ‘Open’ to start uploading it to your Google Drive account.

14. Share the Encrypted File via Google Drive
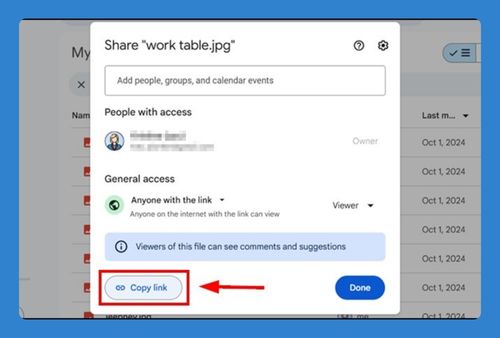
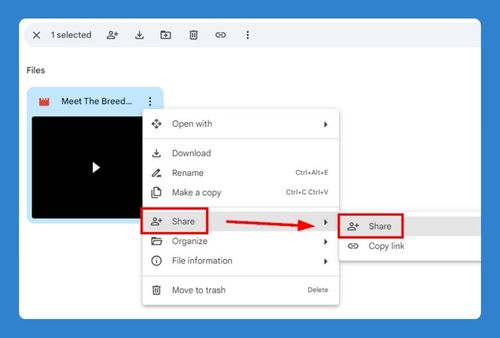
To share your encrypted volume with others, right-click the file in Google Drive and select ‘Share’.

Enter the email addresses of the individuals you want to grant access to and press Send. For example, let’s send it to Dianne Morgan.

Note: Since the file is encrypted, even if someone gains access to the shared link, they won’t be able to open the file without the VeraCrypt password you set. Additionally, the recipient must have VeraCrypt installed on their computer to decrypt and access the file.
We hope that you now have a better understanding of how to share files with a password in Google Drive. If you enjoyed this article, you might also like our article on how to fix a shared folder not showing up in Google Drive or our article on how to share large files on Google Drive.

