How to Backup Google Drive to a Computer (Easiest Way in 2025)
In this article, we will show you how to backup Google Drive to a computer. Simply follow the steps below.
Backup Google Drive to Computer
Follow the steps below to manually back up Google Drive to your computer and by using Google Takeout.
Method 1: Manually Backup Google Drive to a Computer
Here’s how to manually backup your Google Drive to a computer:
1. Carefully Select All Relevant Project Files and Folders for Backup
Navigate through your files and folders in Google Drive. Use the Ctrl key (Command key on Macs) to select multiple items simultaneously.
In our example, we’ll specifically select documents like the ‘Resource Coordination Plan’ and ‘Comprehensive Project Overview’ to make sure all pertinent data is included in the backup.

2. Initiate Download of Selected Project Files and Folders
Once selected, right-click and choose ‘Download’ to begin compiling your files into a ZIP file. This might take some time based on the file sizes.

3. Extract and Securely Store the Downloaded Project Files on Your Computer
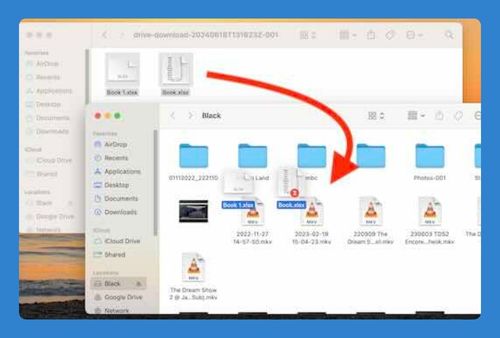
After downloading, locate the ZIP file in your default downloads directory. Extract its contents by right-clicking.

Then, transfer them to a secure location. For example, we’ll store our files in a dedicated backup folder named “Work Projects.”

Method 2: Using Google Takeout to Backup Google Drive to a Computer
Follow the steps below to backup Google Drive to a computer using Google Takeout.
1. Access Google Takeout to Prepare for Project Data Export
Visit Google Takeout to start the data export process. This tool allows you to download data from all your Google services.
2. Customize Your Google Drive Data Selection for Specific Project Documents
In Google Takeout, select ‘Drive’ and then choose the specific types of files you need by clicking ‘All Drive data included’. This customization ensures you only backup what’s necessary.

3. Specify Which Project Files to Include
Once you’ve clicked on ‘All Drive data included’, you can specify exactly which files or folders you want to export. In our example, we’ll specifically select ‘Project Documents’. Then, click ‘OK’ to proceed.

Scroll down to click ‘Next step’ to proceed with the setup.

4. Choose File Type, Frequency, and Destination
First, set the destination for your backup. For example, we will choose ‘Send download link via email’. This ensures that we can access the backup directly through our email.

Next, set the frequency of your export—whether it’s a one-time download or every two months for a year. Then, choose the file type, such as ‘.zip’, and select the file size that suits your needs.
In our example, we will choose a manageable file size like 1 GB to ensure the files are easy to handle.

5. Confirm Destination and Start the Export
After setting your preferences, click on ‘Create export’ to start the backup process.

6. Download Your Exported Project Files and Ensure Their Safety
Once the backup is ready, you’ll receive an email with a download link. Follow this link to retrieve your data and store it in a secure location on our computer.

We hope that you now have a better understanding of how to backup Google Drive to a computer. If you enjoyed this article, you might also like our article on how to use Google Drive to backup a computer or our article on how to backup files to Google Drive.


